
Going from installing coilover suspension to attempting a cross-manufacturer engine swap is, to put it lightly, a leap. And regardless how much careful research you’ve done prior, there are some things that you’ll have to learn the hard way. You’ll break stuff, end up stranded, get on a first-name-basis with tow truck drivers, rack up an obscene amount of favour-debt, and maybe one day, you’ll end up with your dream build. In an attempt to reduce said pain and anguish, here’s a not-so-complete list of every lesson learned, during my two years owning an Ecotec swapped Mazda Miata.
Just buy that damn plug ‘n play harness
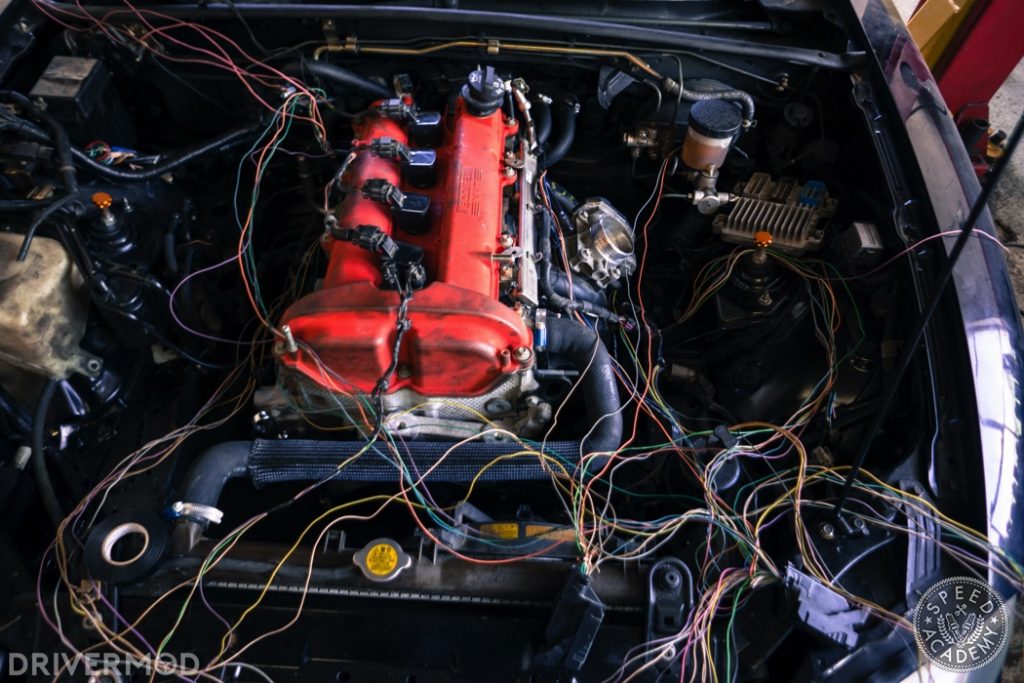
Engine harnesses are expensive, so why would you buy that thousand-dollar plug ‘n play harness when you can pull a harness out of a junkyard Camaro, and use it to power your LS swapped S13?
First – used harnesses are usually old and brittle, so when you start pulling them apart to modify them for use in your ancient Nissan, you’re going to end up breaking stuff. Stuff that you’ll only find out about when you try to start the car for the first time. Naturally, you’ll end up fixing it with a mixture of crimp connectors and electrical tape – which will inevitably come apart 200 miles into your first road trip.
If you have any hesitation in your ability to wire your car, just buy that expensive harness. You’ll save on tow truck bills later. Trust me.
Exhaust gaskets and flex pipes
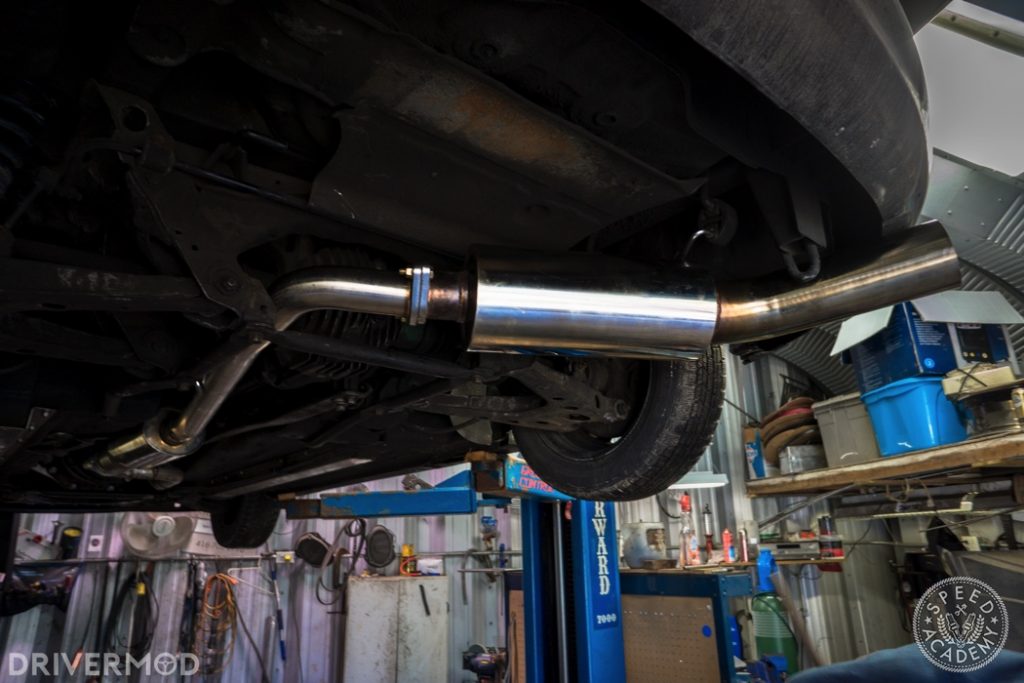
Probably the most frequent and consequential issue I had, was my exhaust header falling apart. The EcotecMiata swap used a 4-2-1 header, which would vibrate itself loose, causing an exhaust leak before the O2 sensor. If the header fell apart completely, it would incapacitate my clutch fork. First, we tried using double nuts and locking washers to keep it together, but the gasket in the middle of the header would still fail. After trying a bunch of different gaskets, we eventually just welded the header together. There are two lessons here:
- Use quality gaskets, and if possible, put your first gasket a few feet down the exhaust system. The closer it is to the engine, the more heat it needs to deal with.
- Use a flex pipe and an appropriate number of hangers. There were three hangers on the Miata’s entire exhaust system; all located behind the rear axle. That meant there was a ton of downward pressure on the header. Combined with the additional vibration that resulted from not using a flex pipe, and we were asking for trouble.
Engine bay heat management is an art
Your engine bay is home to a lot of heat – heat from your exhaust, heat from coolant hoses, heat from power steering/oil cooler lines. It’s also home to a bunch of things that don’t like heat. In particular – wiring, brake and clutch lines, and your intake. In my case, I underestimated how hot my power steering lines would get on track, and they melted through my wiring harness. Remember, even if you don’t melt your wiring harness, when wires get hot, resistance goes up, and that generally leads to bad things.
Pay careful attention to how you route your wiring harness and treat your initial few drives/events as test periods. There’s a good chance you’ll need to make adjustments, add heat shielding where necessary, or reroute things completely.
You can’t diagnose an engine swapped car with conventional wisdom
Story time. The longest, most infuriating issue this car had was a multiple-cylinder misfire at highway speeds. I’d be cruising along, the CEL would start flashing and my wideband would start showing 10 (i.e.; hella rich) If you’re not familiar with a ‘misfire’, here’s a quick explanation.
An engine needs three things to run: fuel, air, and spark. It needs those in the correct mixture, at the correct time (i.e.; ignition timing) If your air/fuel mixture and/or spark timing is off, you’ll get a misfire. Naturally, that means a bazillion different things can cause a misfire. In my ignorance, I threw parts at the problem. Over the series of four months, I ended up replacing:
- Fuel filter
- Spark plugs
- Coil packs
- Fuel injectors (cleaned and rebuilt by Toronto Injectors)
- O2 sensor
- MAF sensor
- MAP sensor
- Intake manifold gaskets
- Timing/balance shaft chains and tensioners
Why? Because these are things that can typically cause a misfire condition. Obviously, none of this helped and I ended up spending $1000 on random garbage. The real problem was ECU related – and I still don’t fully understand it. Matt from MT mentioned a corrupt calibration. A reflash and re-tune finally fixed the issue.
TLDR; this isn’t your dad’s Chevy Blazer, so his advice doesn’t hold much weight in this situation. Take the time to do a proper diagnosis when figuring out issues, and if you can’t, take the car to someone who can. It’ll most likely be cheaper.
Forget about road tuning
Here’s a basic explanation of naturally aspirated tuning; you need to hit every combination of throttle position and RPM possible, and tune each combination for fuel and ignition timing. When done properly, it takes hours of trial and error.
You’re not going to manage that on a road tune; not even close. Dyno tunes are an expensive, but mandatory part of an engine swap. Even the best flash tune won’t work perfectly with your motor, intake, headers, injectors, throttle body, etc. because no swap is the same.
Don’t mess around with oil pressure

Oil starvation isn’t something unique to Ecotecs – it happens to LS motors, Honda engines, and virtually anything else when subjected to enough lateral g-force. It also happens to be the fastest way to kill an engine. If you are planning on road racing or lapping your swap, I’d encourage you to invest in a baffled oil pan.
You should also have a plan for monitoring things like oil pressure and water temperature early on, that way you can integrate all of your signal wires neatly into the wiring harness. Keep in mind that an oil pressure light is generally more useful than an oil pressure gauge, as you won’t notice your oil pressure gauge dropping while lapping, but you’ll definitely notice a red light in your face.
Polyurethane/solid engine mounts don’t belong in a street car

Take a moment and look at your interior. See that mixture of hard plastic and hard plastic that’s been delicately snapped together three decades ago on a Japanese assembly line? Now imagine all that plastic, buzzing, all the damn time. That’s what it’s like driving a street car with polyurethane engine mounts. It’s terrible. You’ll mutter “because racecar” through your teeth as your cowl cover, A-pillar and center console all clatter simultaneously, an hour into your six-hour automotive adventure, and by the sixth-hour, you’ll be begging for some ultra soft, Corolla-style rubber mounts. Not to mention the vibration being fed through the steering wheel and pedals straight to your extremities.
Don’t do it.
Final thoughts
Take the time to do things right. Shrink wrap those wiring connections, install that extra exhaust hanger, bolt up that oil cooler, and take the extra time to get those clearances right. Most importantly, if you’ve never done something before – even something as simple as drilling and tapping a hole, get help. And if you can’t get help, just pay someone to do it. It’ll probably be cheaper than cleaning up your inevitable mess. Most importantly, good luck, you crazy mofo.